Why use an Instagram scheduling app?
You’re using Instagram and finding it’s driving good engagement. Now you’re ready to step up your game and start pre planning your feed with an Instagram scheduling app. We have all been on Instagram, ready to post the perfect photo when it gets lost in your feed and you have to scramble in order to find it again. Then you spend another 15 minutes thinking of a killer caption. What you thought was going to take only a minute turned into 30. Skip the hassle next time and start scheduling your posts with one of our reviewed Instagram scheduling apps.
Still skeptical? Here are some statistics to change your mind:
- Major brands post an average of 1.5 times per day which is 10.5 per week.
- It can take upwards of 1 hour from planning to captioning an image, which is 10.5 hours per week!
- The highest engagement rates may not be during business hours.
As always here at Brightspark, we love to use social media tools that make us more efficient and to take away the pain from manual processes. We had been using Planoly for a long time, then Hopper came along, so we decided to road test that for a bit. Below are the results of the great test: which Instagram scheduling app should I use (2021 edition)?
1. Planoly
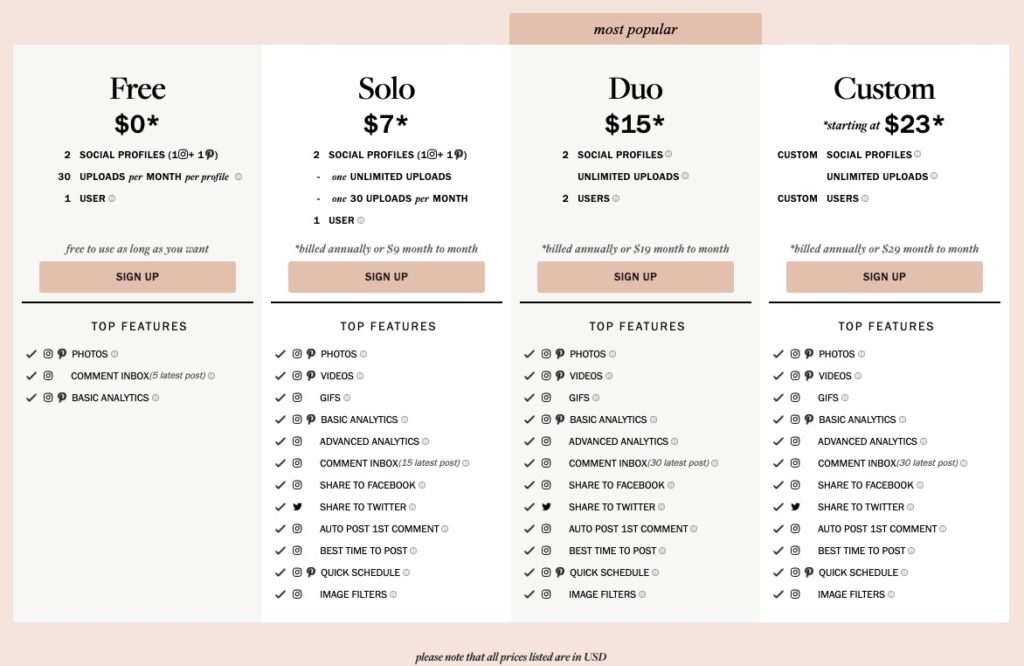
Planoly is a free Instagram scheduling app with paid add on features available for monthly and annual plans. It can be used on desktop and with the app, available for iOS and Android. We used the free version for a very long time, it’s grand without it. It’s only when you need to bring on multiple users and increase your posting, you need to go on to solo. But it’s cheap! Just $7 per month.
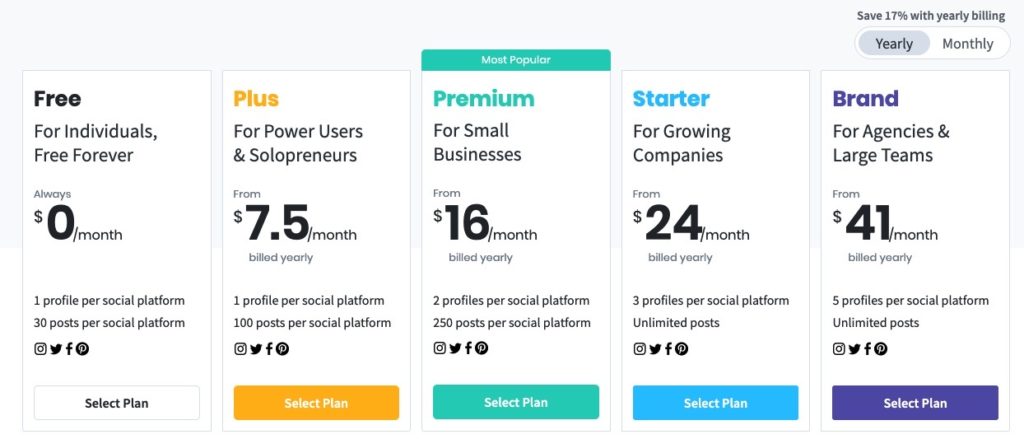
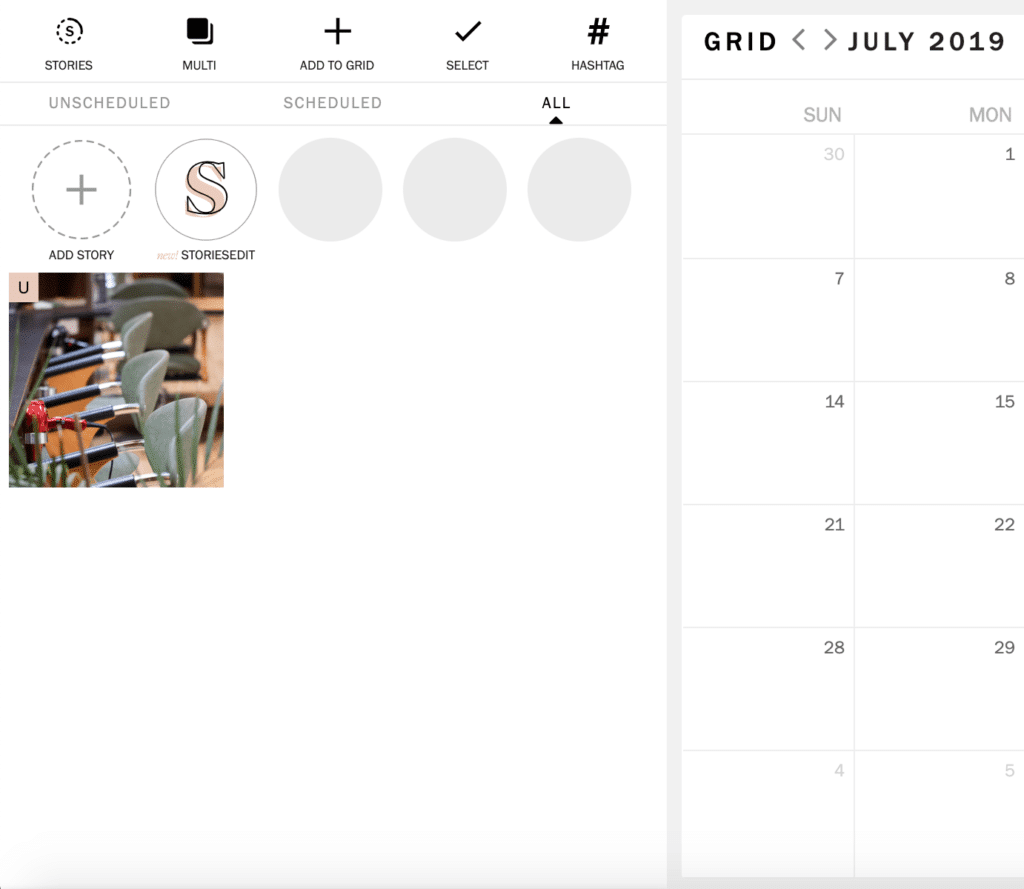
When using Planoly, we planned the content on desktop, and then posted manually using the app. Auto posting can be tricky on Planoly so follow this link for instructions and guidelines on how to set it up. You can see from the pricing below that you can do 30 posts per month for free
Pricing
Steps for using Planoly:
- Go to https://www.planoly.com or download the app.
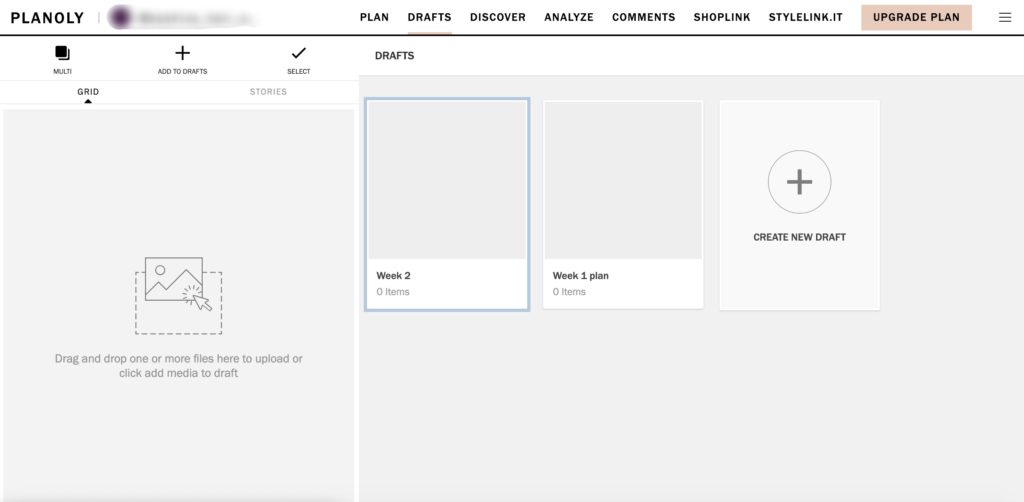
- Use either the plan or draft tabs, making sure to link your Facebook in order to set up Auto Post, which is only available for business accounts.
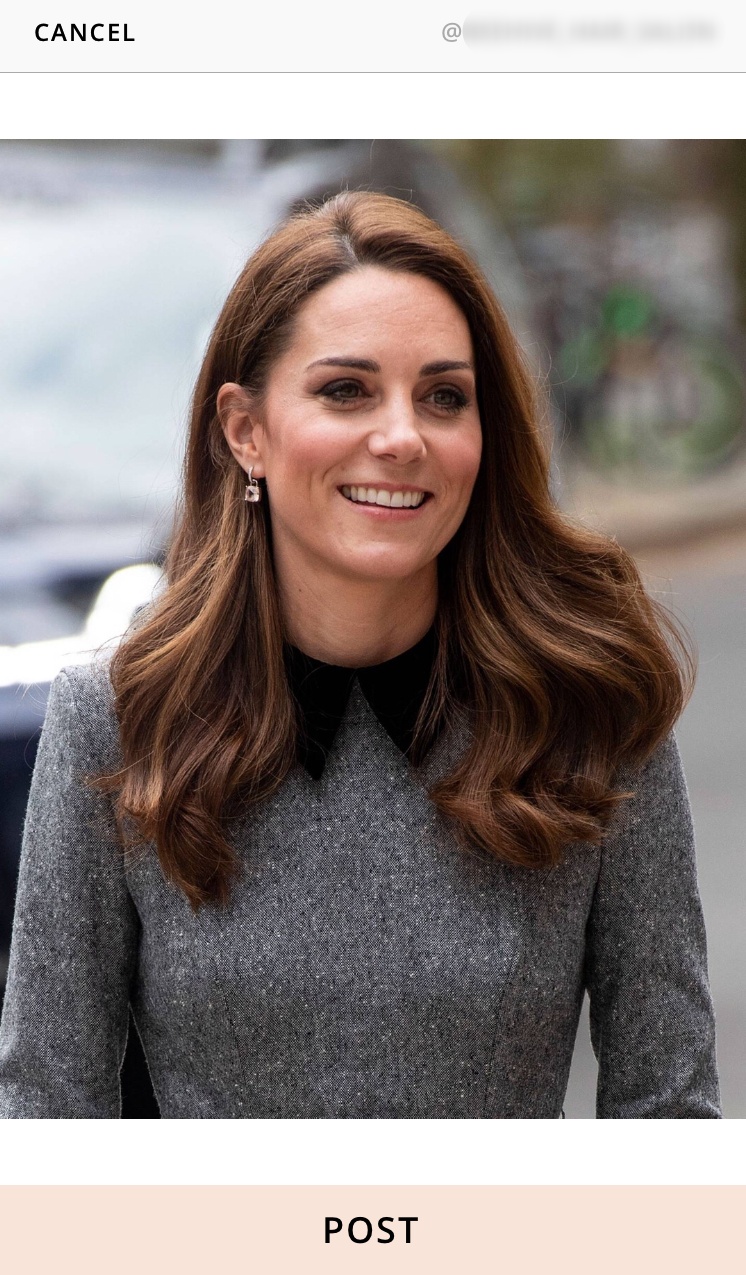
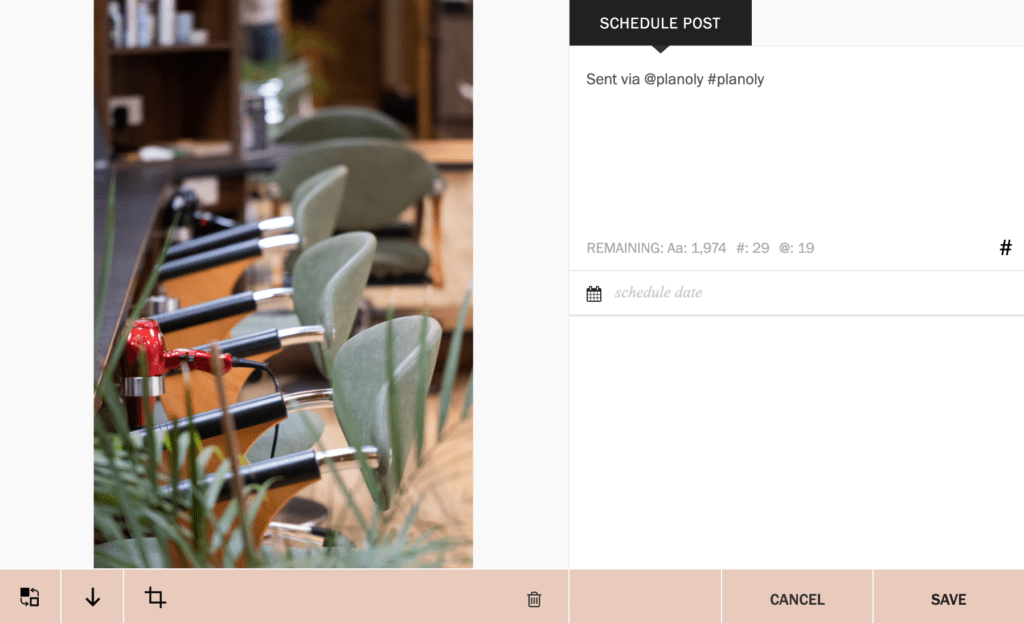
- Click on an uploaded image to caption and schedule then move to the app and hit “Post Now.”
- You will be brought to a separate screen, hit “Post” then “Ok.”
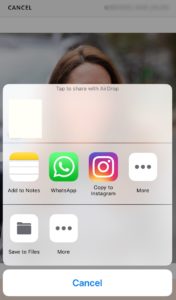
- The share tab will pop up, hit “Copy to Instagram.”
- Follow the posting menus then paste your caption from your clipboard.
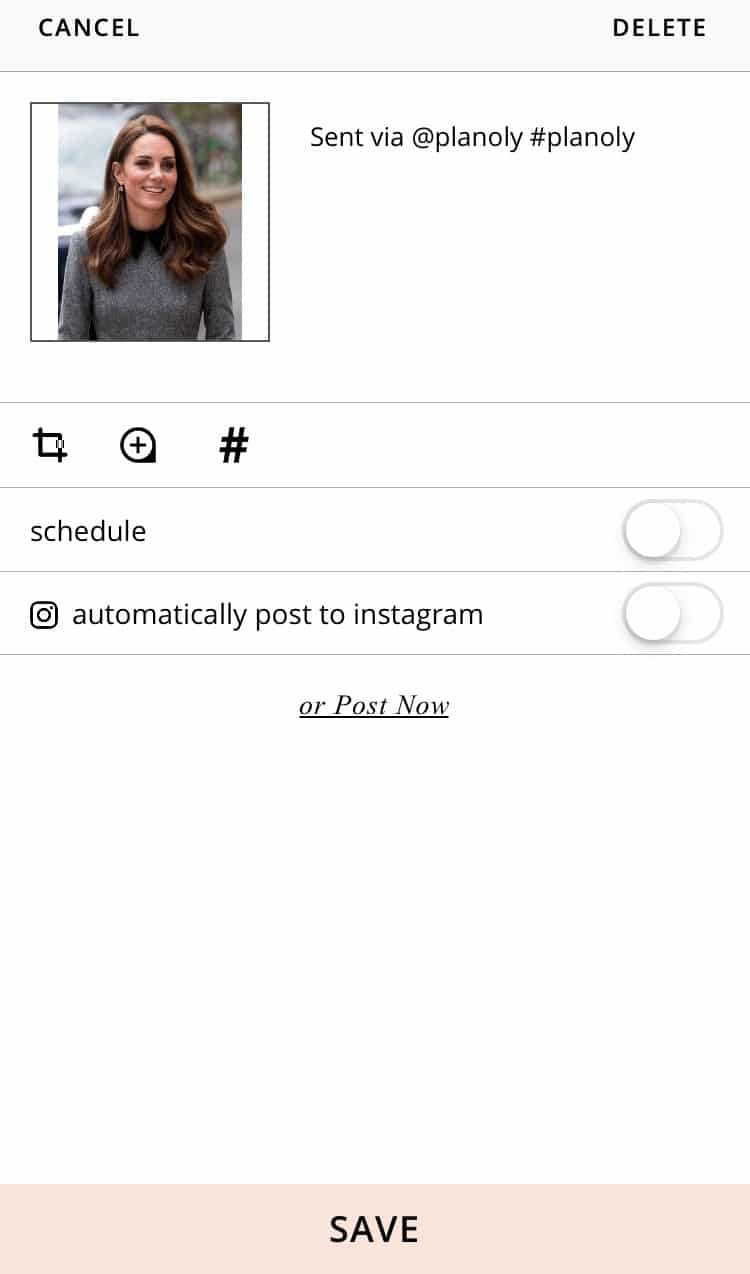
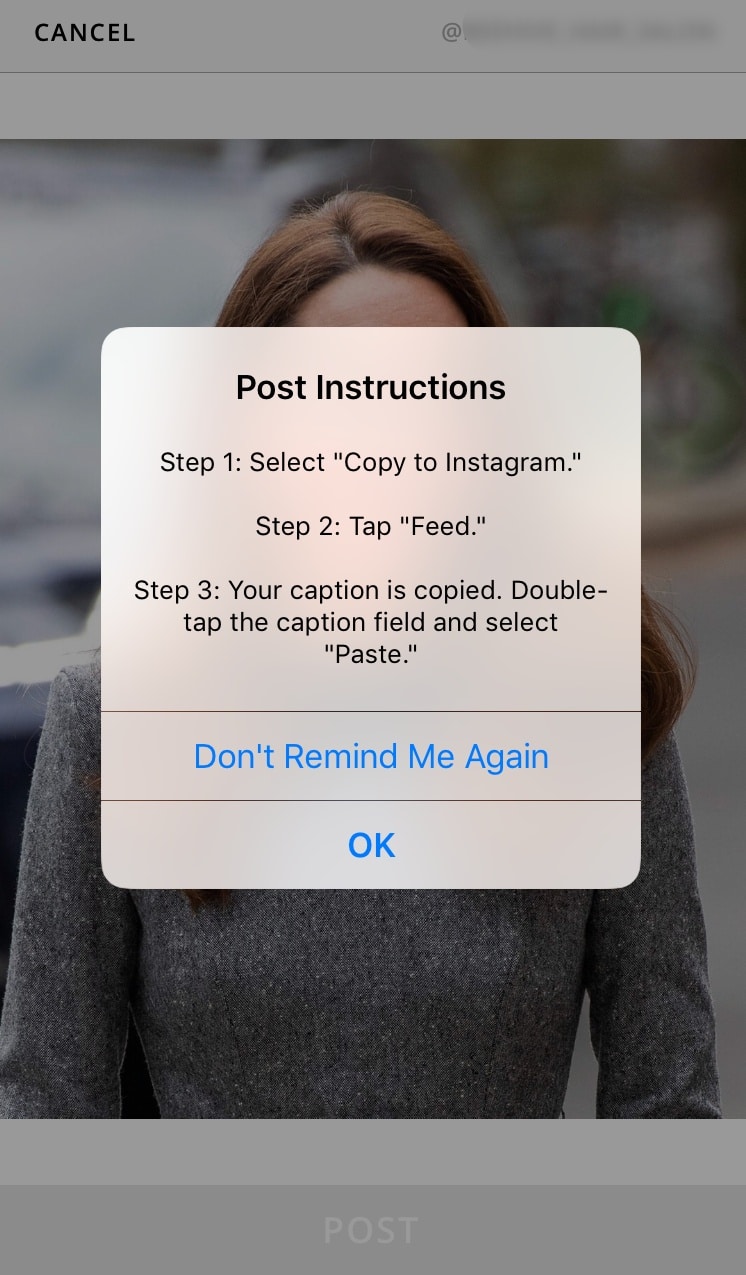
Our Verdict?
Planoly is not bad. Auto post is useful for business accounts, just know that if you have a personal account you must post manually. If manual posting is the case for you, don’t worry it only takes a few seconds to post if you have everything ready in Planoly.
One of the main benefits to Planoly over other Instagram scheduling apps is that it allows you to post to stories on the free version, a huge plus.
There were some problems. Sometimes Planoly deleted an image when moving from the app to Instagram. We noticed this happened when Instagram needed to refresh. So, if you open it beforehand or move fast when on the “post to story or feed” screen once it redirects you to Instagram, this reduces the likelihood of it happening. It is a bit annoying, but the glitches were nothing in comparison to Hopper HQ.
Planoly Rating: 4/5 – accurate and easy Instagram scheduling tool.
2. Facebook Creator Studio
Features 4/5
Facebook Creator Studio is a free service you can use to manage your Instagram account. It can be accessed from your desktop or from the mobile app. You can also use it to manage your Facebook posts. Facebook Creator Studio features:
Manage Posts
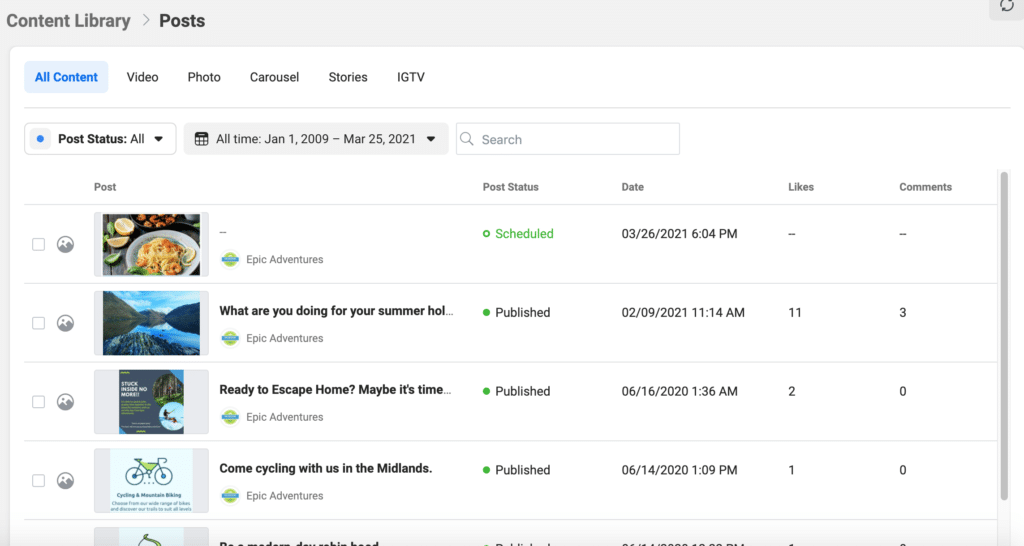
- View all your content from your saved content library
- See the engagement performance of each post
- Organise posts by using filters
Analytics Reporting
- See who is following you
- See how many users are interacting with your posts
- Learn how your content is being discovered
These features are great, but they are a little bit basic. Facebook Creator Studio includes all the baseline tools you need to effectively schedule your Instagram posts.
Ease of Use 5/5
Linking your Instagram to Facebook Creator Studio couldn’t get any easier. We love that you can see all of the past posts you have done, including stats about the likes and commen
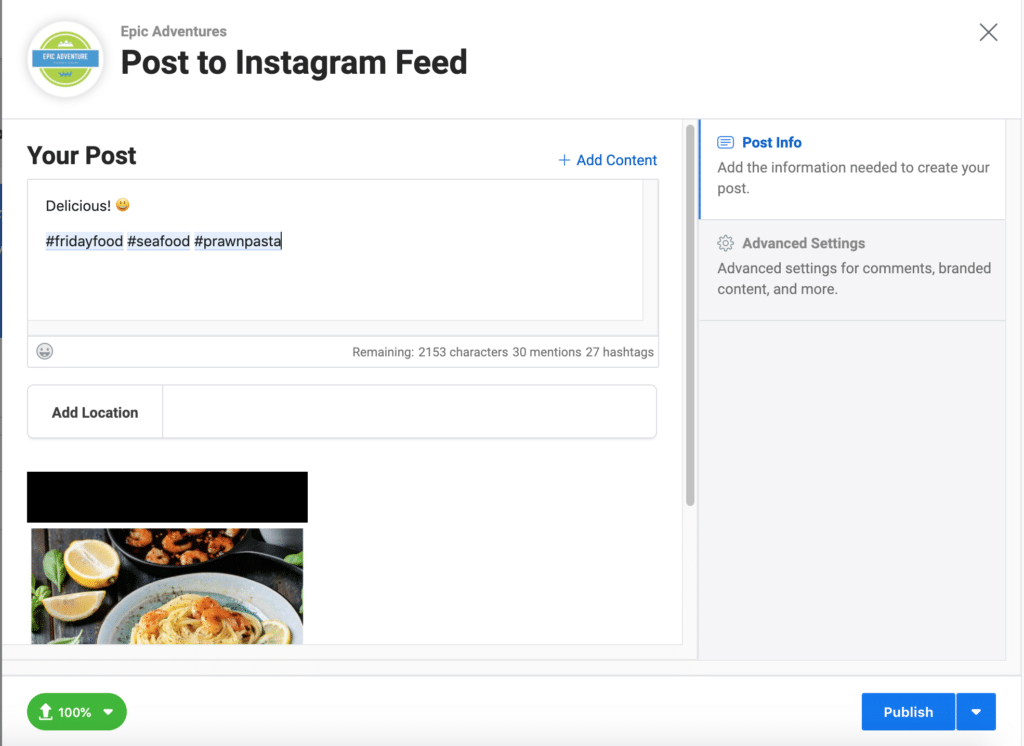
When creating a post, all you have to do is select “Create Post” and choose if you want a regular fee post or IGTV post. Unfortunately, you can’t schedule stories. When we took Creator Studio for a test run, we decided to stick with a regular feed post. As we wrote our post, it was super handy to see how many characters, mentions, and hashtags we had left to write.
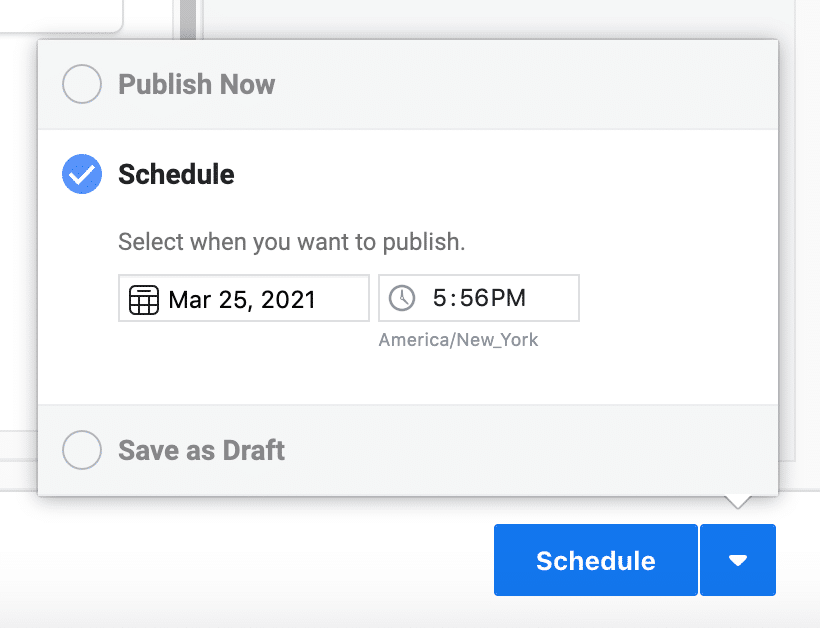
Once you’re done creating a post, you can post now, schedule it for later, or save it to your drafts. You can see your scheduled posts in a calendar view, but you can’t drag and drop it.
The insights page is very easy to use. We liked that we could see our activity and audience information in one organized space.
Price 5/5
It is free! It’s from Facebook, but we kind of don’t like the way they are trying to remove all the other Instagram scheduling apps.
Would we recommend Facebook Creator Studio?
We recommend this for you if you want a free tool that will do the job right. It’s not for you if you like to spend ages fixating on your feed and making edits based on how things look to your learned eye.
3. Later.com
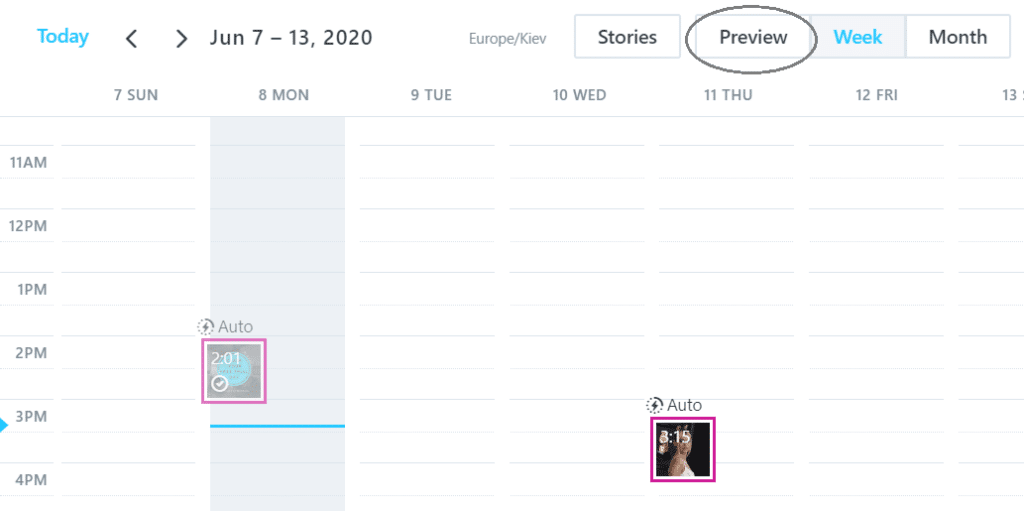
Later.com is the original Instagram scheduling app. It’s easy to sing up and get going on Instagram scheduling. The platform is pretty easy to navigate, you can upload your content in a couple of clicks and then drag and drop onto the calendar to schedule. Add some text and hashtags and you are ready to go.
Although we trialed the free version, you can upgrade to enable features such as suggested hashtags which is good. The free version enables 30 posts per month, but again you can upgrade to a paid version to be able to increase this quota.
Pricing
The basic version of Later.com is free to use, which is a positive. It allows you 1 profile per platform and 30 posts per month, great if you are just starting out. There are various options if you want to upgrade, which will give you more posts each month and additional features such as best times to post and hashtag suggestions. Take a look below or head over to Later.com to see their price structure.
Steps to using Later.com
- Go to Later.com and sign up for your free account.
- Follow the prompts to connect your Instagram account to enable auto scheduling.
- Provide basic details as to what type of business you carry out, to get relevant insights.
- Start uploading your content.
- Drag and drop your content onto the calendar.
- Add your text and hashtags.
- If you want you can add a first comment with a link to go out with your post.
- Check you are happy with your date and time and then save.
- You can preview your page to see how the post will look alongside what you have already posted.
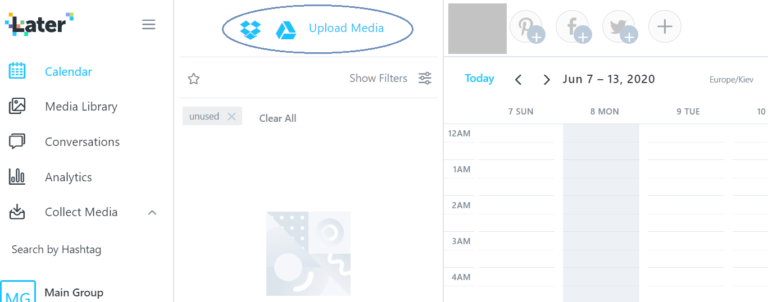
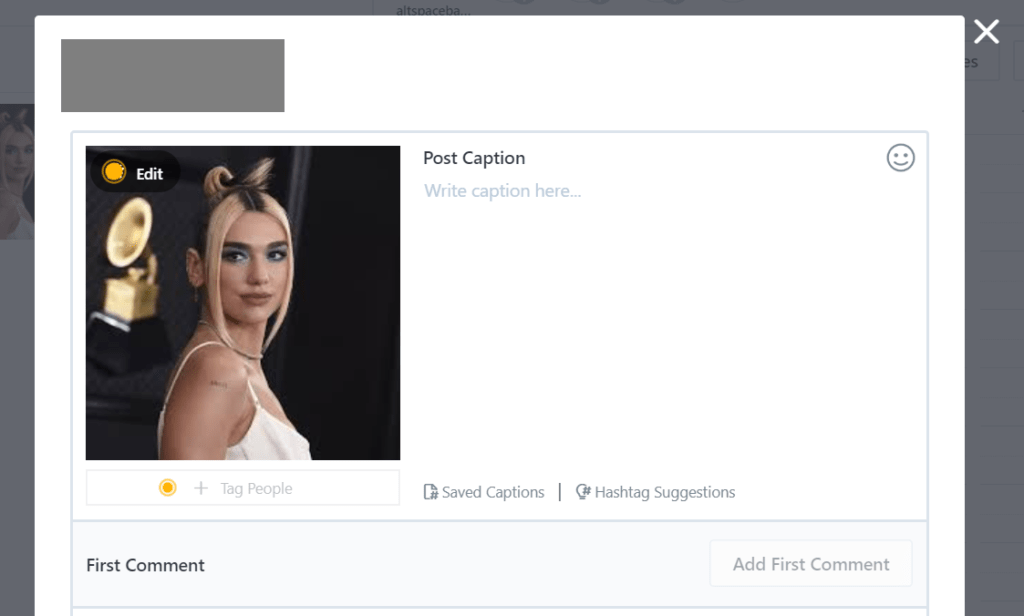
Our Verdict?
Later.com is super useful for both personal and business accounts alike. The drag and drop onto the calendar makes it really intuitive and easy to use. But one thing to watch out for – since this feature is so easy to use, we would recommend double checking you have dropped onto the right slot on the calendar before posting, we nearly got caught out a couple of times. The free version limits how many accounts you can connect to and how many posts you can publish each month. Posting to Stories is possible with Later.com but only on the paid versions!
Rating: 3/5 – Really simple to use, need to double check your times though.
4. Tailwind
Features 3/5
Tailwind allows you to schedule your Instagram posts. You have to download the app in order to make it work.
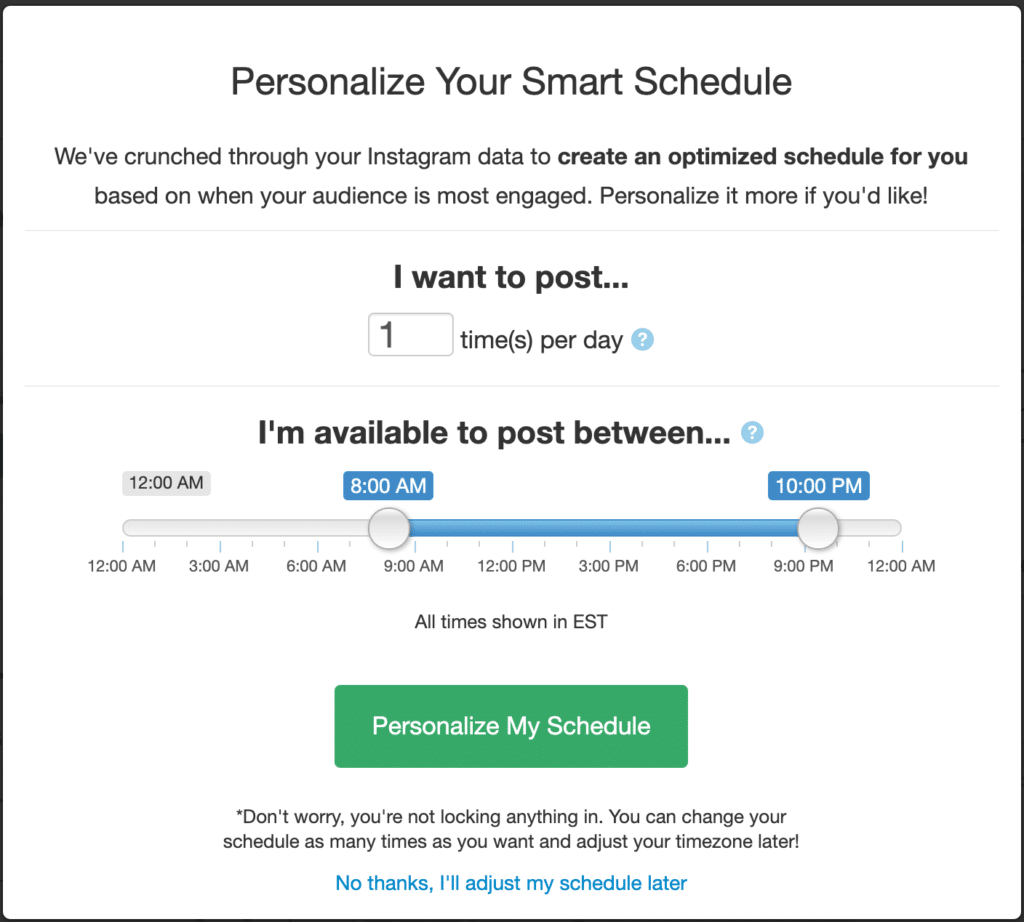
Tailwind gives you a personalised ‘Smart Schedule’ based on the traffic of your social account. You can view the schedule in a grid to preview how it will look on your profile page.
The publisher section on Tailwind allows you to create the posts and see all your saved drafts. You can also edit your weekly time slots for posts. The schedule can be edited manually or updated using the ‘Smart Schedule’ if the traffic on your social profile has changed. You are able to pause all your content from posting if you find that they need editing or rescheduling.
Ease of Use 4/5
Signing up is easy, but having to download the app and sign in too is a bit of a hassle. Even if you don’t plan on using the app for scheduling, you have to set it up on your mobile device.
Other than that, all the features are simple to use. The published section includes drafts, scheduled posts, published posts, and your schedule in one place. Tailwind is an easy to navigate Instagram scheduling app and great for beginners and pros.
Price 2/5
Both of the Pinterest and Instagram packages are $9.99 a month, billed $119.88 annually. The plans include 1 user and 2 collaborators. You can have 1 account and can also set up post approval from the user if a collaborator has scheduled a post.
- 30 scheduled posts
- Hashtag finder
- Hashtag lists
- Drag and drop calendar
- You can schedule hashtags to go out in 1st comment
Would We Recommend Tailwind?
Tailwind is for you if you are hung up on keeping your caption area tidy because you can schedule the hashtags to go out in your first comment. We like that!
5. Hopper HQ
Hopper appears to be an easy to use Instagram scheduling app with nice features, but it deleted our posts on multiple occasions rendering it useless. We had to post manually, dig up the photos and recreate our captions since they are not copied to your clipboard like with Planoly. This was frustrating and wasted time. 😠
Pricing
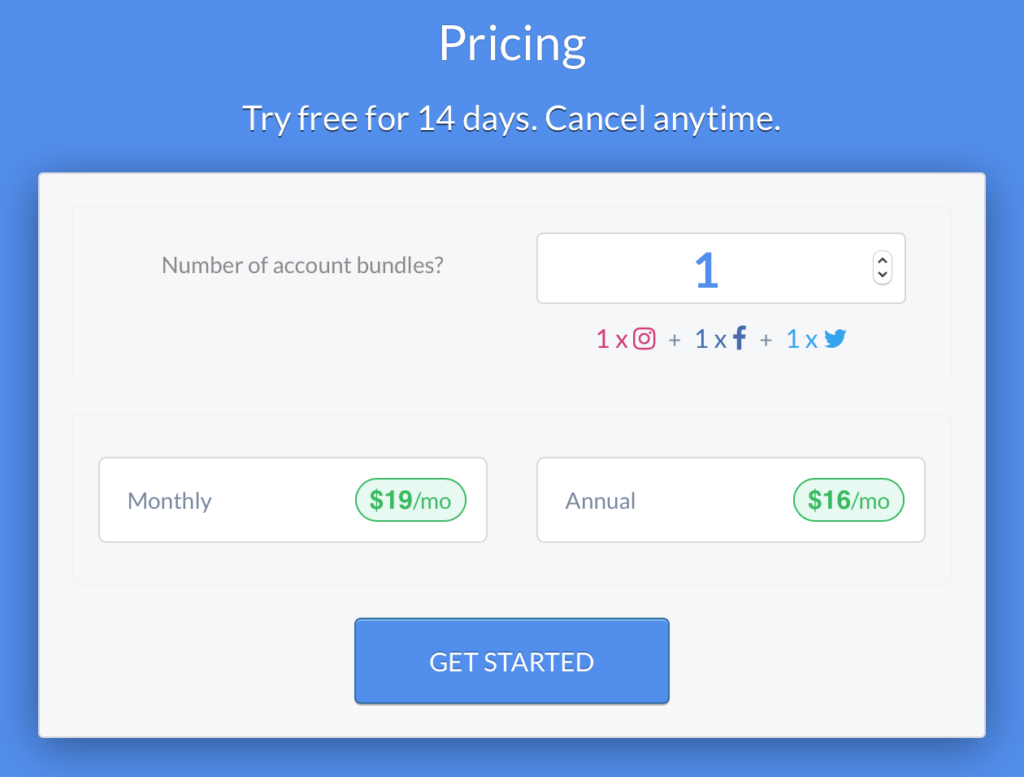
Hopper is a paid online application, offering a free 14 day trial when you join (but you need to enter a credit card in order to sign up). They have a different pricing model than Planoly, so refer to this G2 article for more information.
Essentially it is $19/month for one account on Instagram, Facebook and Twitter.
Steps to post using Hopper
- Go to https://www.hopperhq.com/plan-select/ and sign up for your 14 day trial. We chose the monthly plan, since it was less of a financial risk in case we forgot to cancel the subscription after our trial.
- Link your account to Facebook to enable auto post.
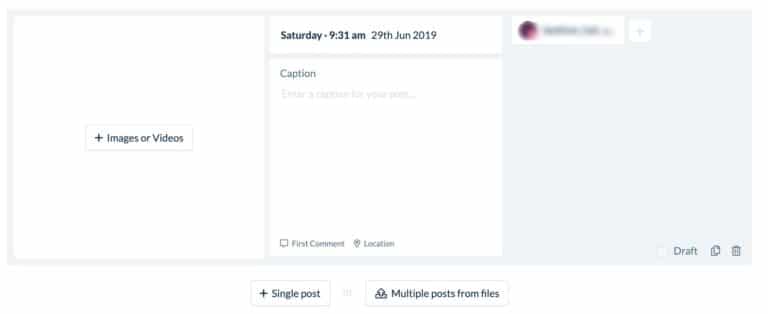
- Click “Create Posts”, then single or multiple posts.
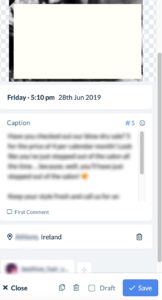
- Click “Add Image” and select from files or drag and drop. Here you can also schedule the post, add your caption, add a location and draft it.
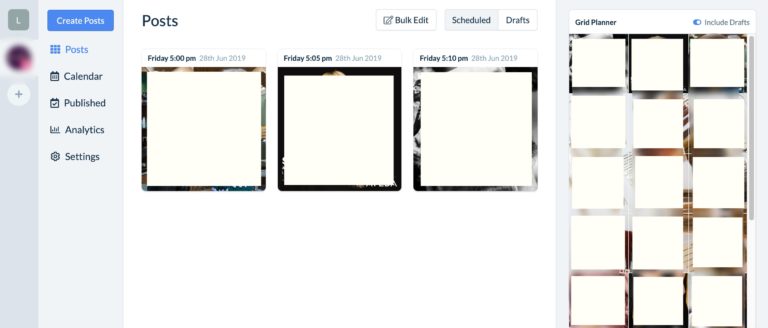
- To publish a drafted post, click on the image in the grid → click the date section and change the time (or click post now) → unclick draft → save and it will post at that time.
- Now it will show up in the scheduled section. You must give at least 5 minutes between posts or else it will glitch and rearrange the order of posting, messing up the grid.
Our verdict?
Although customer service reached out to us after we canceled our free trial, we do not recommend this app until the bug is fixed. The deleting of posts happened on multiple occasions, negating the purpose of using a scheduling app to save time. Also, there is no ability to post to stories at all with this app!
Rating: 1/5 – An absolute pain to use.
Which Instagram Scheduling App To Use?
Planoly – It got the job done for free
It was a really close call between Planoly and Facebook Creator Studio, but Planoly just pipped it. We thought the value was excellent with Planoly seeing as it allows posting to stories for free, with Later.com this is a paid feature, and Hopper does not support posting to stories at all!
We hope you have enjoyed this review of Instagram scheduling apps. If you currently use a scheduling app, let us know your favourite and happy scheduling!


